Running pliers are one of those tools that looks simple, gets skipped by a lot of beginners, and turns out to be responsible for more clean breaks than any other single technique. If you’ve been snapping glass by hand and getting inconsistent results, running pliers are almost certainly the fix.
For more handy details, ready my detailed running pliers how to use guide.
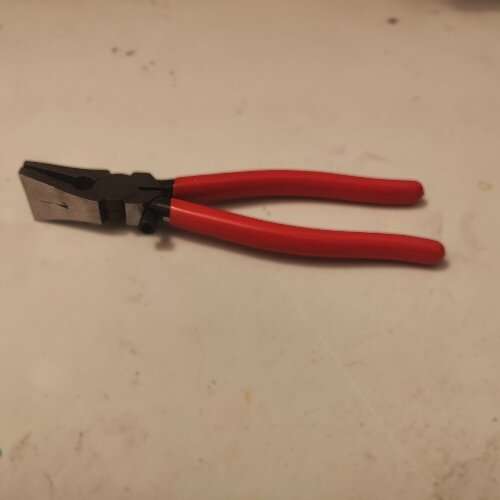
What Running Pliers Actually Do
When you score glass, you create a stress line on the surface. Breaking the glass means running that stress line all the way through — turning a surface score into a complete break.
Hand breaking works by applying outward pressure on both sides of the score simultaneously. The problem is that hands apply uneven pressure, especially on longer scores or when the piece is awkward to grip. The break starts well and then veers off the score line partway through.
Running pliers solve this by applying even, controlled pressure exactly at the score line, from one edge. The curved rubber face concentrates force along the score in a way hands can’t replicate. The break runs the score cleanly because the force is exactly where it needs to be.
Parts of Running Pliers
Running pliers have three main parts worth understanding:
The curved rubber face. This is the business end. The curve matches the natural flex of glass under breaking pressure. The rubber protects the glass surface from scratching.
The center mark. Most running pliers have a line or notch on the top face, centered on the tool. This is your alignment guide. It goes on the score line.
The adjustment screw. On the bottom jaw, there’s usually a screw that adjusts how far the jaws open. This controls how much pressure is applied before the break runs. Set it too tight and the pliers crack the glass rather than running the score. Too loose and they don’t apply enough pressure to start the break.
Running Pliers How to Use: Step by Step Guide
Step 1: Make a Clean Score
Running pliers can’t fix a bad score. The score needs to run edge to edge with consistent pressure. A choppy, incomplete, or rescored line won’t run cleanly regardless of how well you use the pliers. If the score isn’t right, cut a new piece.
Step 2: Set the Adjustment Screw
The bottom jaw screw should be set so the jaws open slightly wider than the thickness of your glass. A small gap between the lower jaw and the glass when the upper jaw is seated on the surface is correct. The pliers should feel snug but not be clamping hard before you squeeze.
If you’re using the same glass thickness regularly, set this once and leave it. Check it when you switch to thicker or thinner glass.
Step 3: Align the Center Mark to the Score
Place the curved rubber face against the edge of the glass. The center mark on the top of the pliers should sit directly over the score line. This alignment is critical. If the pliers are even a few millimeters off-center, the pressure distributes unevenly and the break may veer.
Position the pliers at the end of the score where you want the break to start. Usually this is the end closest to you.
Step 4: Apply Gradual Pressure
Squeeze the handles slowly and steadily. Don’t squeeze fast. Gradual pressure gives the break time to run the score from the point of contact inward.
You’ll often hear or feel the break running before you see it. A faint crackling sound means it’s working. Keep squeezing slowly until the break completes or runs as far as it’s going to from that end.
Step 5: Flip and Repeat if Needed
On longer scores, the break may run from one end and stop before reaching the other. This is normal. Flip the glass, realign the pliers at the other end of the score, and apply gradual pressure again. The two break fronts meet somewhere in the middle and complete the separation.
Common Mistakes with Running Pliers
Our running pliers how to use guide can’t be completed without a closer look at the most common mistakes, such as squeezing too fast, poor alignment, or wrong jaw adjustment.
Squeezing too fast. Fast pressure gives the break no time to follow the score. It shoots off in a random direction or the glass cracks rather than running the line. Slow and steady is the only way.
Off-center alignment. If the center mark isn’t on the score, the break won’t run the score. Check alignment every time, especially on the first few uses until it becomes automatic.
Wrong jaw adjustment. Too tight and the pliers crack the glass. Too loose and the break won’t start. If you’re getting unexpected cracks or the break won’t start, jaw adjustment is the first thing to check.
Using them on bad scores. Running pliers amplify what’s in the score. A good score runs cleanly. A bad score breaks badly, just more forcefully. They’re not a rescue tool for poor scoring.
Starting in the wrong place. Always start at the edge of the glass, not in the middle of a score. The break needs an edge to run from.
When to Use Running Pliers vs. Breaking by Hand
Hand breaking is fine for:
- Short straight cuts on large pieces
- Simple breaks where you have a solid grip on both sides
- Practice cuts on scrap to understand how glass breaks
Running pliers are better for:
- Any score longer than about 4 to 5 inches
- Cuts close to the edge of a sheet
- Cuts where the resulting pieces are too narrow to grip safely by hand
- Whenever hand breaking has been giving inconsistent results
When in doubt, use the pliers. The extra few seconds of setup produce a cleaner break than hand breaking on almost every cut.
Running Pliers vs. Breaker Pliers
These are different tools that do different jobs. Beginners sometimes think they’re interchangeable. They’re not.
Running pliers start a break from an edge and let it run the score. They work on straight cuts and gentle curves where the break can travel a distance.
Breaker pliers grip and snap small amounts of glass. They’re for nibbling along a score on tight curves, removing small pieces, and breaking off shapes that are too small to grip otherwise.
You need both. Our stained glass cutting guide covers the full cutting toolkit and where each tool fits in the process.
Conclusion
Running pliers are one of the cheapest and most effective upgrades to clean glass breaking. Once you use them consistently, hand breaking starts to feel like a workaround. They cost $10 to $20, they last indefinitely, and they remove most of the inconsistency from the breaking step. For the full picture on scoring and breaking technique, our stained glass cutting guide walks through every step in detail.
FAQ
Do I really need running pliers for stained glass?
Yes. Hand breaking works on simple cuts when conditions are perfect, but running pliers handle a much wider range of cuts reliably. They’re especially important for longer scores, cuts near sheet edges, and any situation where the pieces are too narrow to grip safely. At $10 to $20, they’re one of the best value purchases in the hobby.
How do I know if running pliers are aligned correctly?
The center mark on the top of the pliers should sit directly over the score line when viewed from above. The curved face should be flush against the glass edge. If the pliers feel like they’re sitting at an angle or the center mark is off the score, realign before squeezing.
Why did my glass crack instead of breaking cleanly?
Most likely the adjustment screw is set too tight, causing the pliers to clamp hard before the break starts running. Loosen the screw slightly so there’s a small gap between the lower jaw and the glass when the upper jaw is seated. Also check that you’re applying pressure gradually rather than squeezing fast.
Can running pliers be used on curved cuts?
For gentle curves, yes. For tight curves, running pliers don’t work well because the break can’t follow a sharp arc. Tight curves require the nibbling technique with breaker pliers, taking small bites along the score rather than trying to run the whole curve in one break.