Glass cutting looks deceptively easy. You drag a small wheel across the surface, apply some pressure, and the glass snaps where you want it. Then you try it and the break shoots off diagonally, or the score chips, or nothing runs at all. This stained glass cutting guide is for that moment, because cutting trips up almost every beginner, and the problem is almost never the tools. It’s technique: grip, pressure, speed, and understanding what a score actually does to glass. Get those right and consistent cuts follow faster than you’d expect.
What You Need Before You Start Cutting
Glass Cutter
You need a carbide wheel cutter, self-oiling if possible. Carbide holds an edge far longer than steel, and the self-oiling reservoir means the wheel stays lubricated without you having to dip it manually between every score. Spend $15 to $40, get carbide, get self-oiling. Anything cheaper is false economy. Worn wheels produce scores that look fine and break badly. If you want to sort your purchase before reading on, our stained glass tools guide has a full breakdown of what to look for, including specific recommendations.
Running Pliers and Breaker Pliers
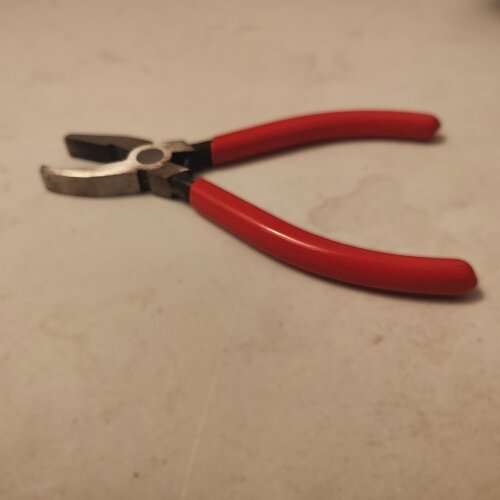
Running pliers have a curved rubber face that applies even pressure along a score line to initiate the break. Breaker/grozer pliers grip and snap smaller pieces, and let you nibble away glass along a score when breaking by hand isn’t possible.
You need both. Running pliers handle straight cuts and gentle curves. Breaker pliers handle the awkward shapes and small pieces. Trying to do everything by hand works until it doesn’t, usually at the worst possible moment.
Cutting Oil
Oil lubricates the wheel, reduces friction, and helps produce a consistent score. A dry wheel skating across glass makes a score that looks reasonable and breaks unpredictably.
Dedicated glass cutting oil works best. Sewing machine oil is a common substitute. Don’t use WD-40 or cooking oil. If your cutter has a self-oiling reservoir, check it before each session. An empty reservoir is easy to miss.
Work Surface
You need something flat, stable, and with a very slight give. A homasote board is the standard. It’s a dense cellulose fiber board that won’t damage glass, accepts pins for holding pieces, and is cheap at any hardware store. A thick rubber mat on a sturdy table works too.
A completely hard surface like bare wood can cause fractures to run in the wrong direction on the break. Anything that shifts or wobbles under pressure will do the same.
How to Score Glass Properly
Most cuts that go wrong were never going to go right, because the score was bad. How to score glass properly is the single technique to nail first, because there’s nothing you can do with a break to fix a bad score — if you want to understand the physics behind why, the Corning Museum of Glass covers glass fracture mechanics in plain terms. You’re committed the moment the wheel lifts off the glass.
How to Hold the Cutter
Hold the cutter between your index and middle fingers with your thumb supporting underneath, similar to a pencil grip but with a bit more control over vertical angle. The cutter should be nearly upright, maybe 5 to 10 degrees off vertical. Not leaning.
Your elbow and shoulder do the work, not your wrist. Lock your wrist and move your whole arm along the line. Wrist scoring produces wavering pressure and subtle directional drift, even when it feels straight.
Stand directly over the line you’re scoring. Not to the side. Directly over it. This lets you see the score line clearly and keep pressure straight down rather than at an angle.
Pressure and Speed
Too much pressure and the wheel digs in, chips the surface, and produces a rough, jagged break. Too little and the score is too shallow to run. Most beginners err toward too light because it feels safer.
The right pressure produces a hissing sound, a consistent, continuous ssss as the wheel rolls along the glass. That sound is your real-time feedback. Silence means too light. Scraping or crunching means too heavy.
Speed should be moderate and steady. Not rushed, not a crawl. More importantly, speed needs to stay constant. Accelerating or braking mid-score changes the pressure and breaks the consistency of the groove.
What a Good Score Sounds and Looks Like
A good score is a faint white line on the surface of the glass. Not a deep groove you can feel with your fingernail. Not invisible. Just a thin, even line that runs edge to edge.
A choppy score that disappears and reappears usually means the wheel was skipping, from a dry cutter, inconsistent pressure, or a damaged wheel. A deep grey-white groove with raised edges means too much pressure.
Score once. Don’t go back over it. Rescoring the same line crushes the groove and makes the break worse.
Common Scoring Mistakes
Dry wheel. The most common. The score looks fine, the break goes wrong. Check your oil before every session.
Stopping mid-score. Glass retains stress at the stopping point and the break often shoots off there. Score in one continuous stroke, edge to edge, without pause.
Rescoring. Running the cutter over an existing score doesn’t deepen it. It creates stress fractures in the groove. If the score was bad, cut a new piece.
Not starting and ending at the edge. A score that begins or ends inside the glass gives the break nowhere to run. Always start exactly at one edge and carry all the way through to the other.
How to Break Glass on a Score Line
Breaking by Hand
Hand breaking works well for straight cuts and gentle curves on pieces large enough to grip properly. Hold the glass on both sides of the score, thumbs parallel and close together near the line, fingers curled underneath.
The motion is outward and slightly rolling, not snapping down like breaking a stick. Apply even outward pressure while your wrists roll gently downward. The break should run the score in one smooth movement. If it’s resisting, the score may be too shallow, or the piece may need running pliers instead.
Hand breaking gets unreliable when pieces are small, when the score is near an edge, or when cutting close to a previous break.
Using Running Pliers
Place the curved face of the pliers against the edge of the glass, centered on the score line. Most running pliers have a center mark on them for this — for a full step-by-step on setup and jaw adjustment, our guide on how to use running pliers covers the technique in detail. Apply pressure gradually. The break runs the score from that edge inward.
Gradual pressure is the key. Squeezing fast gives the break no time to follow the score and it shoots off in a new direction. Slow, controlled pressure lets it run.
For longer scores, start from one end and, if needed, flip the glass and run from the other end toward the middle.
Using Breaker Pliers
Breaker pliers handle what running pliers and hand breaking can’t: small pieces, shapes near the edge of a sheet, and curves that need to be nibbled away rather than broken in one pass.
Grip close to the score line, jaw parallel to it, not angled. Apply firm, even pressure. For nibbling, work in small bites of 3 to 4mm rather than trying to remove large sections at once. Patience here saves a lot of glass.
How to Cut Curves in Stained Glass
Straight cuts are about consistency. Curves are about understanding what glass will and won’t do. How to cut glass curves requires technique adjustments and, for tight curves, accepting that scoring alone won’t get you there.
Gentle Curves
A gentle curve, roughly 3 inches of radius or more, can usually be scored and broken in one pass. Keep pressure and speed consistent through the arc, which is harder than it sounds because your arm wants to change angle as it sweeps.
Relief cuts help on anything but the most gradual curves. Before breaking the curve, score and remove the surrounding glass in sections with straight or gently angled cuts, working progressively closer to the final curve. This reduces the material resisting the break.
Tight Curves and the Nibbling Technique
A tight curve can’t be broken out in a single snap. The glass fractures rather than following the score. The approach is nibbling: score the curve, then use breaker pliers to remove small amounts of glass in repeated bites from the outside edge toward the score line.
Work around the curve in 3 to 4mm increments. It’s slow. It works. Expect to break a few pieces anyway. Tight curves have a learning curve of their own, and experienced cutters still lose material on them.
What Curves You Can’t Cut Freehand
Very tight curves, deep concave shapes, and small radius arcs often aren’t achievable through scoring and breaking alone. A glass grinder fills that gap. You score to approximately the right shape and grind to the precise line. For anyone still choosing a grinder, our stained glass tools guide has detailed buying advice on what to look for at different budget levels.
If you’re doing a pattern with tight curves and don’t have a grinder yet, simplify the pattern. Attempting tight freehand curves without a grinder is where beginners lose a lot of glass and start questioning the hobby.
How to Cut Straight Lines in Stained Glass
Straight cuts are where beginners expect no trouble and sometimes find more than they expect. How to cut straight glass is mostly about removing variables. A straightedge eliminates drift, and consistent grip eliminates the rest.
Using a Straightedge
A metal straightedge or T-square gives you a guide to run the cutter against. Place it along the intended score line and hold it firmly. Run the cutter along the flat side of the straightedge, keeping the wheel in contact with the guide throughout the score.
The common mistake is angling the cutter slightly away from the guide mid-stroke, which lets the wheel drift. Keep the cutter vertical and maintain contact with the straightedge the whole way. Rubberized straightedges or a strip of rubber cement on the underside of a metal ruler stops it from shifting while you score.
Common Straight Cut Mistakes
Lifting or nudging the straightedge mid-score is the main one. Even a small shift repositions the guide and the score follows it. Hold it down firmly and don’t adjust until the wheel has left the glass.
Starting the score from inside the glass edge is the other common error. The cutter needs to start at the very edge and carry through to the other edge. A score that begins 2mm in from the edge won’t break cleanly from that end.
Common Glass Cutting Mistakes
These are the common glass cutting mistakes that cause most of the wasted glass and frustrated sessions. Not generic warnings, but the actual things that go wrong.
Rescoring a line you’re unhappy with. It almost never improves the score and usually makes the break worse. If the score is bad, cut a new piece.
Too much downward pressure on the break. Pressing down instead of outward when hand breaking cracks the piece in the wrong direction. The motion is outward and rolling, not a snap downward.
Scoring too close to a previous break. Glass has residual stress near an existing edge. Scoring very close to it produces unpredictable breaks. Leave at least 3 to 4mm of clearance where possible.
Waiting too long to break after scoring. A score is a stress line that dissipates over time. Break within a minute or two for the most reliable result. Coming back to a score an hour later rarely goes cleanly.
Using a worn or chipped wheel. A damaged wheel produces a score that looks fine and breaks badly. If you’re getting breaks that veer off-course on seemingly clean scores, the wheel is the first thing to check.
Not testing on scrap first. Every glass type cuts differently. Thickness, composition, and hardness all vary. Before cutting into a good sheet, run a few practice scores on offcuts. Two minutes of practice saves expensive material.
Things I Wish I Knew About Cutting Stained Glass
The hissing sound took me too long to actually hear. I’d read about it in every guide before I started. Then I scored mostly silently for weeks without realizing it. One day I heard it clearly and immediately understood what every description had been pointing at. Once you hear it, you know, and you can’t miss its absence anymore.
Glass doesn’t care about your pattern. I had a piece score perfectly. I could hear it, see the clean white line, everything felt right. Then I broke it and it ran exactly the wrong way, right through a part of the pattern I needed intact. That’s when I learned that a good score only controls where the glass can break. Relief cuts are what control where it does break. Nobody explained that clearly before I figured it out the hard way.
A good score can still produce a bad break. I spent a lot of time getting scoring right, then kept losing pieces because I was rushing the break or applying pressure in the wrong direction. The score is half the job. The break matters just as much, and it took me longer to treat it that way.
Textured and opalescent glass cuts differently than cathedral. The first time I cut opalescent glass I used the same pressure I’d been using on cathedral. It chipped on the break and I couldn’t figure out why. Opalescent is denser and less forgiving. It needs a slightly heavier score and a cleaner, faster break. Each glass type has its own personality. Expect a few wasted pieces every time you switch to something new.
Trying to cut tight curves freehand without a grinder was costing me a lot of glass. Once I started scoring approximately right and grinding to the line, the frustration dropped significantly. Some curves are a grinder problem, not a cutting problem. Knowing which is which saves material and patience.
Table height matters more than you’d think. I spent my first few months cutting while sitting down at a low table. Everything felt awkward and I blamed my technique. A friend pointed out that I was scoring at an angle because I was sitting below the glass surface. Standing at the right table height changed things immediately. You want to be slightly above the glass, looking straight down at the score line, not up at it.
Conclusion
Cutting improves fast once the technique clicks. A proper score, the right break motion, knowing when pliers do better than hands — these feel uncertain at first and become automatic within a few projects. If you want to see where cutting fits into the full stained glass workflow, our beginner’s guide to stained glass walks through every step from choosing a pattern to finishing a panel. Start with clean scores. Everything downstream depends on them.
FAQ
How do you score stained glass properly?
Hold the cutter nearly vertical between your index and middle fingers, with your thumb underneath for support. Apply consistent downward pressure as you drag the wheel across the glass in a single uninterrupted stroke, edge to edge. The right pressure produces a soft hissing sound. Use cutting oil every time. Score once and don’t go back over the line. Break within a minute or two of scoring while the stress line is still fresh.
Why won’t my glass break on the score line?
The most common causes: the score was too light (no hissing sound during scoring), the wheel was dry, the score didn’t reach both edges of the glass, or too much time passed between scoring and breaking. A score can also look visually fine but be too shallow to run. This usually happens with a worn wheel or without oil. Check those four things before assuming technique is the problem.
Can you cut curves in stained glass?
Yes, with the right approach for each type. Gentle curves can be scored and broken in one pass, with relief cuts to remove surrounding glass first. Tight curves require nibbling: scoring the curve and then using breaker pliers to remove small amounts of glass in 3 to 4mm increments from the outside edge toward the score line. Very tight curves and concave shapes often need a glass grinder to achieve the final precise line. Some curves simply can’t be cut freehand.
What is the best glass cutter for stained glass?
A carbide wheel cutter with a self-oiling handle. Carbide holds its edge far longer than steel, and self-oiling ensures consistent lubrication without having to dip the wheel manually between scores. For most beginners, a cutter in the $15 to $40 range from a reputable brand is the right call. Cheap cutters dull fast and produce inconsistent scores. Professional-grade cutters costing $80 or more aren’t necessary unless you’re doing very high-volume or precision work.