The soldering iron is the one purchase that makes or breaks your experience with stained glass. Not the glass, not the flux, not the foil. The iron.
Buy a bad one and every session becomes a fight with inconsistent heat, dragged beads, and solder that won’t flow right. Buy the right one and the technique clicks fast. I learned this the hard way, and this guide exists so you don’t have to.
In other words, this blog provides you with the best soldering iron for stained glass that won’t make too big of a budget, as well as key info on what makes it the best bang for your buck.
What Makes a Good Stained Glass Soldering Iron
Not all soldering irons are built for stained glass. Electronics irons, plumbing irons, and cheap craft irons all fail for the same reasons. Before getting into specific recommendations, here’s what actually matters.
Wattage
This is the question everyone asks first: what watt soldering iron for stained glass do you actually need?
80W minimum. That’s not a preference. It’s a practical requirement. Stained glass soldering means sustained heat across long seams. A low-wattage iron heats up fine but loses temperature the moment it contacts cold copper foil, and it can’t recover fast enough to keep the bead flowing. You end up chasing heat the whole session.
40W and 60W irons, the kind sold in electronics kits, are fine for soldering circuit boards where the contact is brief and the mass is tiny. They are not fine for stained glass. If the product listing doesn’t mention wattage, skip it.
Temperature Control
Wattage gets the iron hot enough. Temperature control keeps it there consistently.
A fixed-temperature iron either runs too hot or too cold depending on ambient conditions, tip size, and how much glass you’ve been working. It cycles, overshoots, cools under load, overshoots again. You’re chasing a moving target every session.
A temperature-controlled iron with a dial holds steady. You set it once, it stays there — for a full breakdown of what different temperature settings produce and how to dial in the right range for each task, our stained glass soldering temperature guide has the detail. That consistency is what produces smooth, even bead lines.
Tip Compatibility
Over time you’ll want to try different tip shapes. A finer tip for detail work, a wider tip for running long border seams. Make sure the iron you buy uses standard, widely available tips. Proprietary tip systems lock you into one supplier and usually one shape.
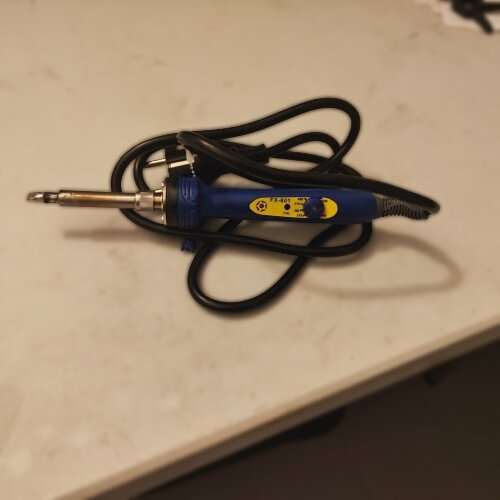
Best Soldering Iron for Stained Glass: Hakko FX-601
I’m not going to pretend there’s a real competition here. The Hakko FX-601 is what most experienced stained glass hobbyists use, what most YouTube creators recommend, and what I switched to after going through two cheaper irons. It’s the right answer for the vast majority of people reading this.
[AFFILIATE LINK: Hakko FX-601]
Why it’s the top pick:
It runs at 80W and has a precise temperature dial that goes from roughly 200°C to 480°C (390°F to 900°F). For most stained glass work you’ll sit between 370°C and 425°C (700°F to 800°F) — our stained glass soldering guide covers temperature settings, technique, and fixing common problems in detail. The Hakko holds that range reliably under sustained use. It heats up in about 30 seconds, which matters when you want to get straight into a session.
The grip is comfortable for long sessions. The tip is a standard Hakko size with a wide range of replacements available. It comes with a stand and a sponge cleaner included.
The price sits around $85 to $100 depending on where you buy. That’s more than a beginner wants to spend before they know if they’ll stick with the hobby. I get it. Buy it anyway. The two cheap irons I bought before it cost me $35 and $45 respectively, performed badly, and I replaced them both within three months. The Hakko is still running fine.
Who it’s for: Everyone. Beginners, intermediates, and experienced hobbyists. There’s no scenario where you outgrow it.
Is There a Good Budget Option?
Honest answer: not really, and I’d rather tell you that clearly than recommend something I wouldn’t use myself.
There are temperature-controlled irons in the $40 to $60 range. Some of them are adequate. Most of them have temperature dials that aren’t particularly accurate, tips that are hard to replace, and build quality that shows within a year of regular use. They’ll get you through a project or two before the inconsistency starts showing up in your bead lines.
If budget is the constraint, here’s what I’d actually suggest: buy a mid-range iron with temperature control in the $50 to $70 range, accept that it’s a temporary purchase, and upgrade to a Hakko when you can. A temporary mid-range iron is better than a permanent cheap one.
[AFFILIATE LINK: mid-range temperature-controlled iron]
What I’d avoid entirely: fixed-temperature irons under $40, electronics irons marketed as “suitable for stained glass,” and any iron that doesn’t clearly state wattage and temperature range in the product description. If the listing is vague about specs, the iron is vague about performance.
What Watt Soldering Iron for Stained Glass?
To be direct about it: 80W is the target. Here’s why the number matters more than people expect.
When you solder a long seam, the iron tip is in continuous contact with cold copper foil. That foil pulls heat out of the tip constantly. A low-wattage iron can’t replace that heat fast enough, so the tip temperature drops mid-stroke. The solder goes grainy, the bead drags, and you stop and wait for the iron to recover before continuing.
An 80W iron has enough thermal mass and power to sustain temperature through long continuous passes. You load the tip, move steadily, and the heat stays consistent the whole way.
Some experienced hobbyists use 100W irons for large panels or border work. That’s fine. Higher wattage gives you more headroom. But 80W handles most standard stained glass work without issue. Don’t go lower. Going higher is a preference, not a necessity.
Irons to Avoid
A few specific things worth warning against, because they come up repeatedly in beginner purchases.
Electronics irons under 60W. Weller WLC100, basic alternatives, and similar. Fine for circuit boards, wrong tool for stained glass.
Craft store soldering irons. The kind sold in hobby stores alongside jewelry supplies and crafting tools. Usually fixed temperature, usually underpowered, often marketed vaguely as “multi-purpose.” The price looks good. The performance doesn’t.
Irons sold in “complete stained glass kits.” Most budget kits include an iron because it rounds out the kit, not because it’s a good iron. If the kit costs $60 total and includes an iron, glass, foil, solder, and flux — the iron is not worth $30 of that. It’s worth $10. Buy the kit for the materials if the price makes sense, but budget separately for a real iron.
Anything without a temperature dial. No exceptions. Fixed-temperature irons are the single most common reason beginners think they’re bad at soldering.
Tips and Accessories Worth Having
Brass wool tip cleaner. Comes with most decent irons, but if yours doesn’t include one, buy it. A damp sponge works but cools the tip every time you use it. Brass wool cleans without the temperature drop.
Extra tips. The iron usually comes with one tip installed. A spare or two is worth having. Tips wear down and the profile changes over time. For most work a standard chisel or bevel tip is what you want. Fine needle tips are for detail work — avoid them for running seams.
Iron stand. Also usually included. If it’s not, any stand compatible with your iron diameter works. You need somewhere to rest the iron between passes that isn’t your workbench.
Conclusion
Buy the Hakko FX-601. If the budget genuinely won’t stretch that far right now, buy a mid-range temperature-controlled iron as a temporary step and upgrade when you can. Don’t buy a fixed-temperature iron and don’t buy anything under 60W.
The iron is the one piece of equipment where cutting corners costs you more in frustration than you save in money. For the full picture on everything else you need before you start, our stained glass tools guide covers every tool category with the same level of honesty.
FAQ
What is the best soldering iron for stained glass beginners?
The Hakko FX-601. It’s 80W, temperature-controlled, reliable, and the recommendation most hobbyists land on after trying cheaper options. It costs more upfront than beginner-oriented irons but performs better from day one and doesn’t need replacing. Beginners benefit from consistent heat more than experienced solderers do. A bad iron is harder to work around when you’re still learning technique.
What watt soldering iron do I need for stained glass?
80W minimum. Lower wattage irons lose temperature when they contact cold copper foil and can’t recover fast enough to keep solder flowing smoothly. The result is dragged, lumpy beads that look like technique problems but are actually equipment problems. 80W holds temperature through long continuous passes. Some hobbyists use 100W for large panels, but 80W handles most standard work.
Can I use a regular soldering iron for stained glass?
Not effectively. Standard electronics irons are typically 25W to 60W and run at fixed temperatures optimized for circuit board work. They’re underpowered for stained glass, they cool too quickly under load, and the fixed temperature means you can’t dial in the right heat for solder to flow and bead correctly. A dedicated glass-working iron with temperature control is the right tool.
How hot should my soldering iron be for stained glass?
Between 700°F and 800°F (370°C to 425°C) for most work with 60/40 solder. At this range the solder flows smoothly, builds a rounded bead, and cools with a clean shiny finish. Too hot and solder goes flat and runny. Too cold and it drags. A temperature-controlled iron lets you set this precisely and stay there throughout a session.